|
The HTML section of the calculator page is where I made the boxes, operations dropdown, answer button, and where the answers are shown. The boxes are where the numbers are put in, the operations dropdown is where the operation options are shown. These include addition, subtraction, multiplication, division, to the power of, and module, which means the remainder. This page is also linked to the Calculator Javascript page.
 First, the code above is for the first text box. The first line is of comments, which explains what the actual line of code does. The second line is the real code, which is kind of split into different sections. The first is type="text", which makes the input a text box that users can type into. Next, the id is so that it is recognized later by the javascript page. The br tag at the end means line break, which spaces out the first text box from the operations dropdown.
 Second, the code above is for the operations dropdown. Again, the first line is the comment, which shows what the section of code does. Next, there is a select tag, which makes it a dropdown. The id of operations is for the javascript section. The class of center is supposed to move the dropdown to the center of the page, but it doesn't. The next 6 lines are all of the dropdown options, which include addition, subtraction, multiplication, division, to the power of, and module. The value = "operation" section is what determines the operation, and the program already knows what it means, so it listens to it. The part after the first greater than sign is what shows up in the dropdown. Finally, the select tag is the end of the dropdown code. The br tag is again a line break.
 Third, this is the code for the second text box. As you can see, it's basically the same thing as the first text box.
 Fourth, this is the code for the equals button. When it's clicked, it the answer is available in the div below. As usual, the first line is a comment. The second uses the tag button to make a clickable button. Within the first tag, there is the type="button", which says that it is a button, the id, which links it to the javascript page, and the class, which again should put it in the center of the page, but doesn't. Once that tag is closed with a greater than sign, it says "equals", which is what shows up on the button itself. Finally, there's a closing tag and line break tag.
 Fifth, and lastly of what shows up on the page, is the div code, which is where the answer is shown. It has, of course, the comment explaining that that's what it is, and in the second line, a div tag. The div tag makes the part that is written "answer: ", and when the equals button is clicked, the actual answer. The style element of this makes what's written in the box the color of the color scheme, dark slate grey. It also includes the id, called answer, which is for the javascript page. After the first tag is closed with a greater than symbol it says "answer: " which is what shows up before the button is clicked, telling the user that that's where the answer will be. Finally, there's a closing tag.
 Lastly, this is the code that connects this HTML page to the Javascript page.
|
 This is the section that creates a variable for each item (each of the sections above, such as the text boxes and dropdown) and links each one with each of the IDs that were listed in HTML code for each section.
  This button listens for when each of the dropdown functions is clicked. It is called mathCalculator because that's how it will be referred to for the function.
 This makes the computer know that I'm setting the function to the mathCalculator dropdown. It also makes the inputs from the text boxes variables called num1 and num2. Finally, it makes the box where the answer shows up a variable, too.
  This is where I actually tell the computer to add the 2 inputs (the 2 numbers from the text boxes). I used an if statement to tell the computer that if the + button of the dropdown is clicked, the two inputs should be added. ParseInt is the function that actually makes it work.
  This is very similar to the addition code, except it uses an else if statement, which means that it's another option.
 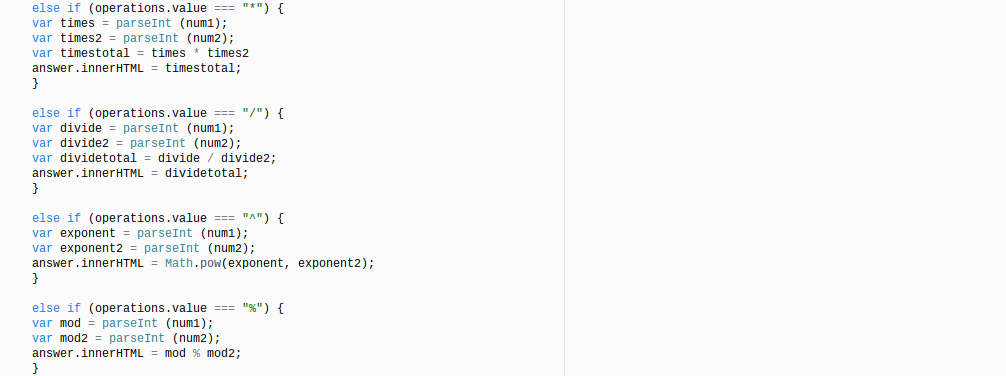 Again, this is for the rest of the operations, which include mulitplication, division, to the power of, and mod, which means remainder of.
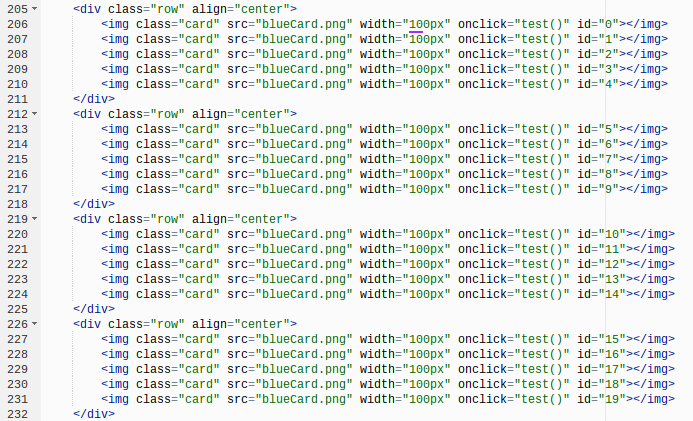 This code is 20 nearly identical images that include a common class, "card", common source, which is the image of the back of the card titled "blueCard.png", a common width of 100 pixels, an onclick, which we don't use, but is there because we were deciding on how to make the game from a number of different ways, and it was from a discarded way, and the not identical id, which starts at 0 and are each numbered. They are organized into 4 divs with each div containing 5 of the elements so that they are in 4 rows with 5 columns.
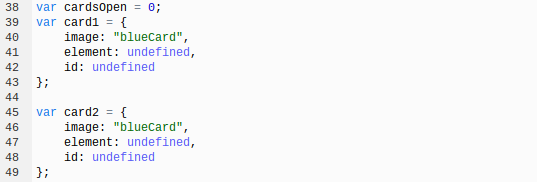 First, this code is a variable called cardsOpen with the number 0 in it. This is so that later we can count how many cards have been opened (showing the front) so that they can get turned back over if they're wrong. We need to know how many cards are opened because otherwise it won't know when to close the cards. The inside number will be replaced with one and two, when the first card is opened then the second is.
  In this section of code, it has the variable cardsOpen, and it has ++, which means that when a card is clicked, the number in the variable increases by one. The reason it needs to increase by one is that in the next section it needs to see if the variable holds a number equal to or greater than 2 (cards open) so that it runs.
 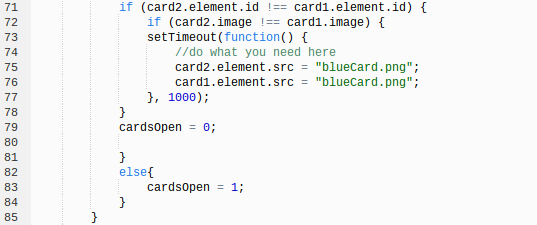 Finally, in this third section, there is another if else statement, which is inside the if statement from the last section. Its condition is that if the element ids of cards 1 and 2 are different, then it should run ANOTHER if statement inside that. The ids have to be different so that the cards can't just be clicked twice and technically have the same image, which would mean that it's right, because it of course has the same image as itself, but it's of the same card. Thus, it makes it so that two different cards have to be clicked in order to check if they're right.